Showing posts with label diy. Show all posts

Tuesday, December 20, 2016

HOLIDAY

Holiday Apartment Decor & DIY Gift Tags


Happy Holidays! x
___________________________________________________

Pinterest Gift Tags


Subscribe to my Youtube Channel

SHARE:

Tuesday, February 9, 2016

EASY VALENTINES DAY TREATS


VALENTINES DAY

is right around the corner, 
If you are celebrating with your loved one, girlfriends or watching Netflix in bed on your couch,
you neeeed to try these treats!
They are super easy to make & so instagram worthy. 

CHOCOLATE PRETZEL RODS

1 package of pretzel rods
White chocolate melts
Heart Shaped Sprinkles
Instructions
Melt chocolate melts, 30 seconds at a time a 7 power level on your microwave so it does not burn 
Grab pretzel rod
Dip rod into white chocolate melts, covering the top half
Roll in sprinkles
Place on tray with tin foil or parchment paper
Place in fridge to harden
Enjoy 

SHARE:

Friday, February 5, 2016

#BAKINGWITHCASS


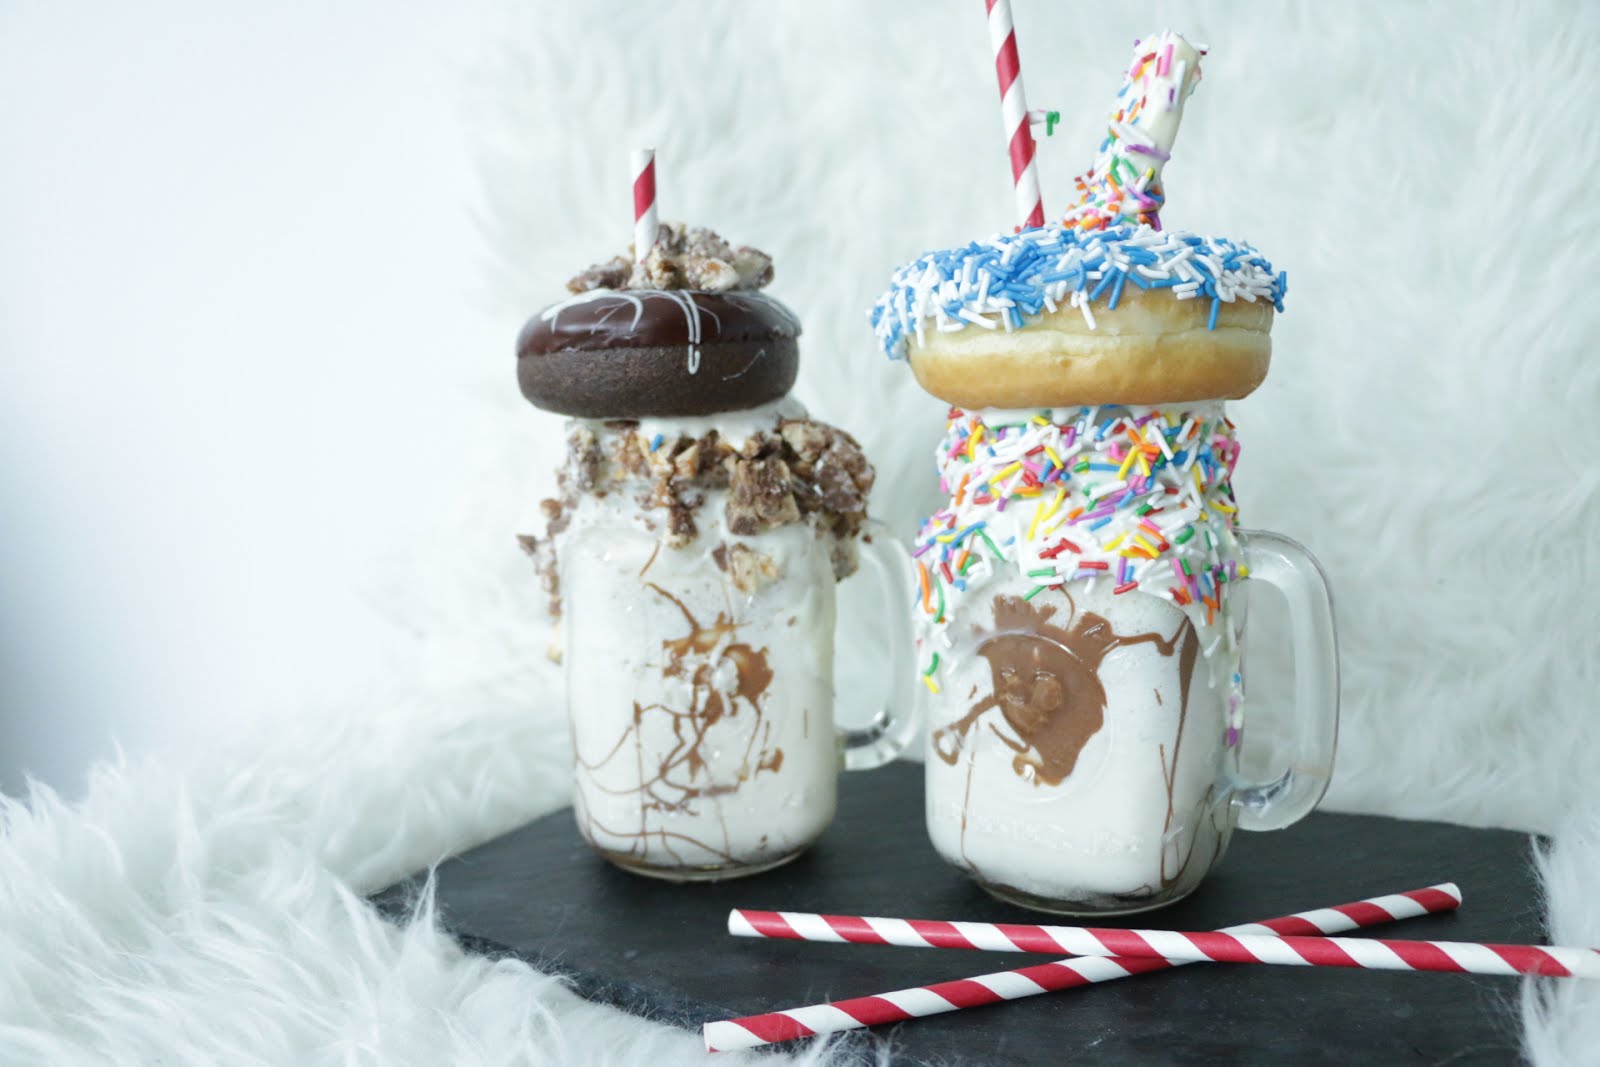
NOT YOUR MOTHERS MILKSHAKE 


#FREAKSHAKES

WHAT YOU NEED: 
Milk ( I used 1% & it was fine) 
Ice-cream, duh
White Chocolate Melts
Milk Chocolate
Sprinkles
Donuts
Skor Pieces
White Chocolate
Whip Cream 
Straws
Mason Jason 

Honestly anything your mom wouldn't let you have as a kid would work! Be creative!

Milkshake Recipe: 
1/3 cup of Milk
1 3/4 cup of Ice-cream 
Blend until smooth! 

These were so fun to make, not to mention they taste amazing & take desert to a whole new level! This would be so fun to make for a party or get together, its way different from a typical cake or cookies your mom would make. If you recreate these, #bakingwithcass or tag me @roseblvdblog I would love to see what you guys make! 

Hope you guys enjoyed this treat! 
Talk soon,
Subscribe to my Blog
Subscribe to my Channel

SHARE:

Tuesday, June 23, 2015

Homemade Popsicles

Let there be Popsicles & Sunshine!


It is finally summer here and what better way to celebrate than homemade Popsicles! I am slightly obsessed with making these. They are perfect for BBQ, backyard parties and hanging around the pool. I love how customizable they are too. You can add whatever you want and make them in all kinds of flavours! These will seriously be the hit at your next party! 

Blueberry Vanilla Frozen Yogurt 


Ingredients: 
1 cup of blueberries 
2 cups of vanilla greek yogurt 

SHARE:

Tuesday, March 10, 2015

DIY Vase

Supplies:
  • Milk Jar 
  • Acrylic Saint Paint
  • Round Sponge
  • Masking Tap
  • Flowers of your Choice
  • Yarn (to tie flowers if not already tied) 

First Step:
Tape Around the neck of the Milk Jar, going on a diagonal, so there is not a straight line across.
SHARE:

Thursday, January 22, 2015

Teeth Whitening

Natural At Home Teeth Whitening
Today I thought I would share a super simple teeth whitening routine that I do at home. I love how easy this is and it actually works! I've been doing this for a couple of years now and really enjoy it. My teeth are far from perfect but doing this before a night out really shines them up! I also use all whitening tooth products which will also help keep them stain free. Hope you guys enjoyed this and try it out for yourselves! 
SHARE:

Sunday, November 30, 2014

DIY Candle

Cinnamon Vanilla Candle // DIY


This is a super cute and easy DIY that anyone can make. This cinnamon vanilla candle makes a cute gift and is a nice way to dress up any plain candles you have at home. The smell of this candle is amazing too. When the vanilla candle burns, it warms up the cinnamon sticks to infuse the scent all around the room. Perfect for this time of year! 
SHARE:

Wednesday, October 29, 2014

Halloween

Breakfast at Tiffany's 
Audrey Hepburn inspired Halloween costume! 


SHARE:

Thursday, July 31, 2014

Home Decor

The Golden State
Easy and modern canvas art! Customize it to whatever state or country you love! 
The golden state is always on my mind so I figured I should create  this art for my new room in my apartment. There will be a ton more apartment decor and DIYS ahead.


1. Trace/Draw your choice of state or country onto a blank white canvas. 


2. Once you have drawn the outline, It is then time to paint it. Choose any colour you would like, I obviously choose gold, againnn. To give it more dimension and shine, I decided to add glitter over top because why not right? 
     TIP: Use a ruler to make your lines straight, rather than free handing it. 


SHARE:

Monday, May 26, 2014

Ombré Nails

Nailed It.

Nail Art has exploded, people are getting more and more creative with their nails. Prints, patterns and accent nails are a huge trend.  This simple ombré nail is super easy to recreate and unique to any colours you choose! 


First Step:
Choose the colours you want to use. If using light pastel colours like myself, then I suggest using a light white or cream colour first so the pastels pop. I used "Vanity Fair" by Essie as a base. 


Apply base coat, then a light colour before you begin.  

SHARE:

Monday, April 28, 2014

DIY FLOWER CROWN

Flower Child
With spring and summer around the corner, I wanted to share a fun DIY. Super easy and affordable. 
Flower crowns are making a breakthrough, from music festivals to street style. Coachella is covered with flower crowns. They are a fun way to add colour to an outfit and the perfect accessory. 


Supplies you will need:
  • Hot Glue Gun
  • Scissors 
  • Elastic Headbands
  • Flowers of your choice


Keep in mind: You can use any flowers that you would like, I picked a bunch up from the dollar store to keep this DIY affordable for everyone. I suggest getting a few branches of the same flower for each headband. Feel free to be creative in your design by using any flowers you find. 

Step One: Separate the flowers from the branches. This is super easy, if you pull the flower off from the stem it should have no problem coming off. 


Step Two: Once the flowers are separated, you will want to cut off the bottom tab off each flower. This will leave a flat base on the bottom of each flower. 
SHARE:

Thursday, April 24, 2014

DIY MUG

Tea Time is Any Time 

Hey everyone! Here is a quick and easy DIY project. A Chic and modern makeover. Perfect for a gift, with mothers day around the corner. You can customize your mug however way you like it. Be Creative. I have created 3 different designs to share with you! 

Here are the supplies you will need:
  • A Mug (cheaper mugs will help your design stay on better) 
  • Gold Paint Pen (Different from a sharpie)
  • Regular Black Sharpie
  • Rubbing Alcohol, in case you make a mistake

Be free to use any colour of sharpie or paint pen you would like! 

Heart Design
  1.  First you want to pre-heat your oven to 350 degrees
  2. Draw or trace out the design you would like on your mug.  I printed a heart out and traced the outline on my mug first. Don't worry if you make a mistake, the paint is easily removable from non-porous surfaces with rubbing alcohol before it sets. Then fill in your design. 


Allow your design to dry to the touch, once it has set, put it in the over for 30 minutes at 350 degrees. This will set the paint so that it is permanent. Let it cool and it is ready to use!

Sharpie Design

For this mug design, i used a sharpie instead of the paint pen. Using the Same method as above, I wrote the phrase "She Loves Green Tea" and even drew a tea bag on the side. You can write anything you would like on your mug. Don't worry if you make a mistake, the sharpie is easily removable from non-porous surfaces with rubbing alcohol before it sets. 
SHARE:

Monday, January 13, 2014

DIY: Canvas Bull

Glitter Bull 

The modern trend of mixing masculine and feminine has had an up spring these past couple of years, along with the animal trend. Hanging decorative moose heads, antlers and skulls have become less country and more modern. This a cheap and easy DIY and a great way to add edge to any room. Feel free to use any design or glitter of your choice, be creative! 

Supplies 
  • Canvas (any size you would like)
  • Stencil of Bull 
  • Pencil 
  • Ruler
  • Scissors
  • Paint Brush
  • Modpoge/Glue
  • Glitter
Steps


1. Once you have all the supplies you need, start off by cutting out your stencil. You can use any stencil or image you would like. It may not fit on your canvas perfectly so don't worry, I ended up free handing the design just by making it bigger to fit the canvas.


2.  Lay your stencil on the canvas, then outline it lightly in pencil. Outline the stencil a bit bigger on your canvas so it fits the size more proportionately. I measured my canvas using a ruler, horizontally and vertically in order to find the centre. Once I found the centre, I placed my stencil in the middle and began to draw. 


SHARE:
BLOGGER TEMPLATES BY pipdig